7 Lesser-Known Mac Screenshot Techniques for Precision Screen Capture in 2024
7 Lesser-Known Mac Screenshot Techniques for Precision Screen Capture in 2024 - Timed Screenshots Using Terminal Commands
Mac's Terminal offers a potent way to capture timed screenshots, surpassing the limitations of the standard screenshot tools. Using the `screencapture` command, you can define precise delays and output formats within the Terminal environment. This enables automating screenshots at specific intervals—like every two minutes—giving you more control over the capture process. To avoid interruptions during the screenshot sequence, the `caffeinate` command can keep your Mac from sleeping. Furthermore, the command-line interface allows for fine-tuning of screenshots, including disabling window shadows and setting custom save locations. Employing the Terminal for timed screenshots empowers users who require a more granular and automated approach to screen capture. While the standard tools are sufficient for basic tasks, the Terminal offers more flexibility for users wanting greater control and efficiency in their image capture workflows.
Leveraging the macOS Terminal for timed screenshots offers a powerful way to automate capturing dynamic screen content. By employing the `screencapture` command and its associated parameters, you can define a delay before the screenshot is taken, ensuring that the desired screen elements are perfectly positioned for capture. This is quite helpful when dealing with intricate layouts or animations, as you can time the screenshot to coincide with the specific moment of interest.
While traditionally associated with still images, the Terminal's screenshot capabilities extend to video recording as well. This duality of functionality can streamline documentation across a broader spectrum within a single workflow.
The `screencapture` command has utility in software development environments. It streamlines testing by automating the documentation of error messages or user interface updates. Because the command uses minimal system resources, it avoids the slowdown that some third-party screenshot tools can cause, a critical factor for resource-constrained systems or during time-sensitive processes.
Advanced users can script more complex workflows that involve batch capturing multiple screenshots. This feature can be scheduled for recurring capture, enabling continuous data gathering over time, which can prove invaluable for research and analysis. Following the initial capture, these images can be further manipulated by other Terminal commands, such as resizing or renaming files, according to user-defined criteria, thus maximizing customizability.
It is also notable that these screenshot commands offer the ability to directly save images to specific file locations, or even to cloud storage services, making organization and management of image data significantly easier, particularly for situations involving high image volumes. Furthermore, the Terminal's `screencapture` supports a range of image formats, including PNG, JPG, and TIFF, offering flexibility based on intended use. This is helpful when considering factors like file size, image quality, and editing flexibility.
By relying on Terminal commands, the screenshot process removes the element of human error, since the steps are precisely defined within a script. This leads to a consistent outcome, a key consideration in situations where accuracy is vital, for example, in legally binding documents or software presentations. There's something inherently reliable about the way this works, and perhaps even elegant, given the simplicity of the process once set up correctly. However, the initial setup might require some understanding of scripting and the command line, so it's not the most intuitive solution for casual users.
7 Lesser-Known Mac Screenshot Techniques for Precision Screen Capture in 2024 - Capturing Touch Bar Content on MacBook Pro Models
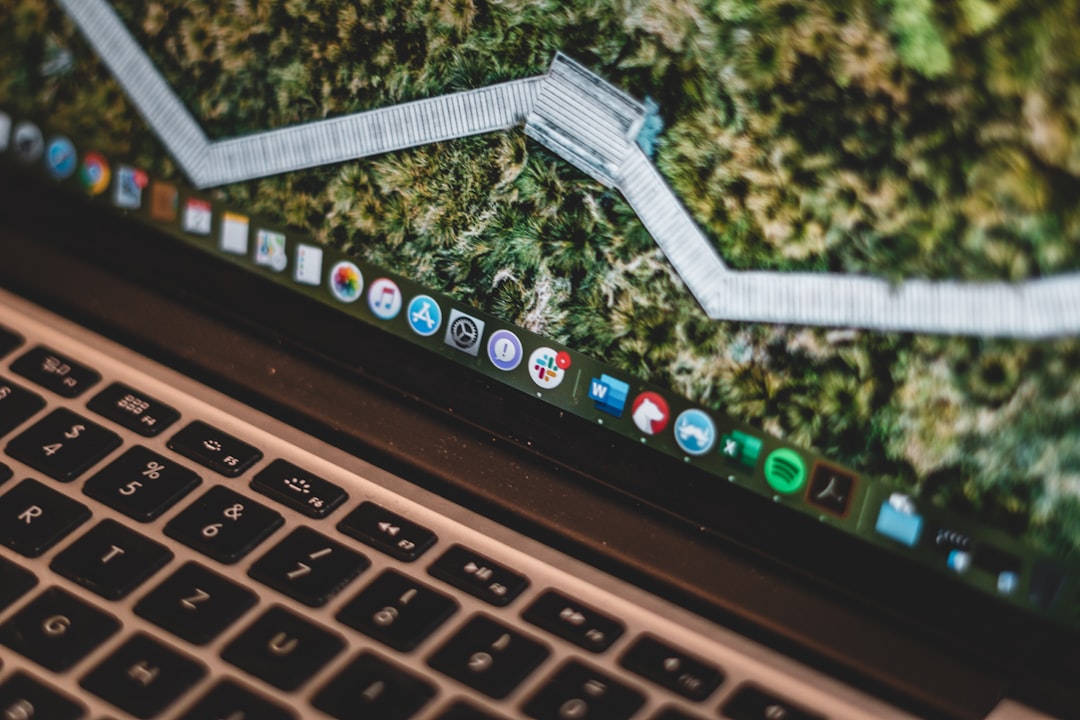
The Touch Bar on MacBook Pro models provides a dynamic workspace, but capturing its contents isn't always intuitive. Fortunately, macOS offers built-in features for documenting the Touch Bar's current state. You can quickly grab a snapshot of the active Touch Bar buttons by pressing Command + Shift + 6, saving the image as a PNG file on your desktop. If you prefer to avoid saving a file, simply swap out the Shift key for Control—Control + Command + Shift + 6—and the captured image is copied to your clipboard instead. You can also refine the Touch Bar to suit your needs. Through the System Preferences, you have the ability to customize it with the functions you find most useful. While it might seem like a small feature, mastering these shortcuts can enhance efficiency for anyone who frequently interacts with the Touch Bar and needs to share or document its contents. It's a handy shortcut for creating visual representations of workflows or showcasing how specific Touch Bar features work.
Capturing the content displayed on the MacBook Pro's Touch Bar can be achieved through dedicated screenshot buttons or keyboard shortcuts, providing a convenient way to document its dynamic interface. While straightforward, it's worth noting that the Touch Bar's content is context-sensitive, changing based on the active application. This means capturing specific elements, such as custom controls or shortcuts, can be tricky if you don't have the correct app focused.
The simplest approach is using the Command + Shift + 6 keyboard shortcut. This captures the Touch Bar's current state as a PNG image file and saves it to your desktop. Alternatively, using Control + Command + Shift + 6 copies the captured image to the clipboard instead of saving it as a file. While the built-in screenshot shortcuts are handy, some screen recording software may not capture the Touch Bar by default, forcing manual capture and subsequent editing steps.
It's interesting to note that the Touch Bar can be customized extensively through System Preferences, allowing you to add, remove, or alter the functions displayed. This customization impacts the screenshot content, potentially changing the visual outcome. However, the Touch Bar's resolution is relatively fixed, with a DPI around 217. This might not be ideal for high-detail captures, requiring scaling or adjustments if the captured content needs further processing.
When capturing the Touch Bar, keep in mind that its content can change rapidly depending on your current actions or the active application. This is because the Touch Bar is designed to dynamically display relevant controls. Consequently, you'll often need to react quickly to capture the desired elements, as the content can shift quickly.
Third-party apps often don't leverage the Touch Bar's full potential. While many are compatible, some applications may not offer a seamless user experience related to the Touch Bar, which might frustrate attempts to capture particular content. On a more positive note, macOS includes accessibility features for the Touch Bar, such as VoiceOver controls, but these are often hidden from users who haven't enabled them. Capturing these elements will require you to understand the current accessibility settings of the system.
Finally, remember that a Touch Bar capture will likely need further processing. Integrating these images into larger documents or presentations might involve editing and adjustments. Failing to prepare captured Touch Bar images for the broader context can lead to a subpar visual appearance in the overall presentation. Understanding these limitations and adjusting your workflow accordingly can improve the usefulness of the resulting captures.
7 Lesser-Known Mac Screenshot Techniques for Precision Screen Capture in 2024 - Utilizing Markup Tools for Instant Annotation
Mac's built-in tools and some third-party options offer a fast way to add notes and highlights directly to your screenshots. The Preview app, often overlooked, includes a useful Markup toolbar. This lets you quickly add annotations like highlighting text, drawing shapes, or even removing backgrounds from the captured image. It's a quick and easy way to refine your screenshots without switching to a separate editing program.
Beyond Preview, macOS lets you activate Markup tools through System Preferences, making them always available. While these tools are handy for personal use, certain third-party annotation apps specialize in collaborative feedback. These apps often integrate features like comment threads and even video overlays to facilitate group discussions on screenshots. This can be useful when you need feedback from others on design mockups, code reviews, or other visual content.
However, keep in mind that the quality of your annotations is ultimately limited by your skill and the sophistication of the tools. While basic features are usually sufficient, more complex scenarios might require a combination of tools and workflows to reach the desired visual quality and clarity. Despite their potential for streamlining the annotation process, these tools aren't always the ideal choice for tasks requiring high levels of visual fidelity. It's wise to consider what tools best suit the complexity of the annotation task at hand.
macOS offers a surprisingly powerful set of built-in annotation tools within the Preview app, often overlooked in favor of dedicated third-party applications. These tools, collectively known as Markup, provide a quick and efficient way to add comments, shapes, and text directly onto captured screenshots.
For instance, you can easily highlight portions of an image by using the rectangle tool with a yellow fill and then add a descriptive text within it. Removing unwanted backgrounds from images is also a simple process within Markup, making it useful for image cleanup.
It's fascinating how seamlessly the Markup tools integrate with the macOS operating system. You can easily access these features via the System Preferences, enabling them through the Extensions panel. Furthermore, a less-known but very handy access method is through the 'Quick Actions' feature. Simply control-click on a document and select the 'Markup' option. This lets you annotate images without needing to open the Preview app itself.
While Preview's Markup might not have the extensive feature set of some dedicated screenshot tools like Droplr or Markup Hero, it offers a valuable alternative for quick annotation tasks. In fact, if collaboration and free options are a priority, Markup Hero is a very interesting choice. Furthermore, there are a number of freely available tools, like Lightshot and Shottr that offer a similar set of features, while others like CleanShot X cater to a broader user base with more elaborate features.
When considering annotation tools, it is worth noting that while programs like zipBoard cater to more advanced annotation tasks with features like feedback comments and video annotations, it remains that a majority of annotation workflows are likely to be satisfied with a simpler set of tools. For many, the built-in Markup capability will provide all the features needed.
7 Lesser-Known Mac Screenshot Techniques for Precision Screen Capture in 2024 - Leveraging Keyboard Shortcuts for Specific Application Windows
When you're working with multiple applications on your Mac, using keyboard shortcuts to target specific windows can really speed up your screenshot process, especially if you're trying to capture intricate or overlapping content. Shortcuts like Command + Shift + 4 allow you to select precise areas of the screen, making it easier to isolate a specific window or section within a complex desktop layout. This keyboard-centric approach helps you bypass menus and reduces the need to constantly switch between mouse and keyboard, leading to faster and more accurate screenshots. It's also worth noting that these shortcuts, when combined with tools like Markup, allow for immediate editing and annotation, making the screenshot workflow even more efficient. Keep in mind, though, that certain applications might have quirks or features that impact how these shortcuts behave, so you might need to adjust your approach based on the program you're using.
Focusing on specific application windows using keyboard shortcuts can significantly boost your workflow. For example, the Command + Tab shortcut lets you switch between apps effortlessly, saving time compared to navigating through menus.
Many programs, like Photoshop or Excel, have their own special shortcuts tailored to their unique features. Learning these can be a productivity game-changer since you can perform tasks much faster than relying on the usual general shortcuts.
Keyboard shortcuts can also help you stay focused within a particular app. Using Control + Command + F to go full-screen can eliminate distractions from other windows, allowing you to concentrate better on the task at hand.
macOS lets you create custom keyboard shortcuts for menu options in apps, opening a path to personal efficiency. Imagine creating shortcuts for common file commands in a program—that's a huge time-saver for your routine processes.
Even System Preferences can be navigated with shortcuts. Shortcuts like Option + F1-F12 can quickly adjust display and sound settings, making system configuration feel more intuitive.
It's interesting how context influences the results of a shortcut. The same shortcut could have different effects depending on what app is active. Understanding this nuance can make you better at picking the shortcuts that are ideal for specific tasks.
Beyond simple copy-paste, the Command + C and Command + V commands can be extended. For instance, Command + Option + V lets you paste content in various formats in certain applications. This sort of versatility is great for handling different data types.
Accessibility features are often tied to shortcuts, too. Command + Option + F5 gives you quick access to Accessibility Options, making things much easier for users who depend on assistive tech.
Using Applescript together with keyboard shortcuts allows automation of repetitive tasks. You can create a sequence of actions triggered by a single keypress—which can result in stunning time-savings, particularly for people who do a lot of development work or are obsessed with productivity.
Some shortcuts work globally, no matter which app is running. For instance, Command + Space brings up Spotlight Search, letting you quickly access files and programs without switching away from your current task. This kind of thing is really useful for those who juggle multiple things at once.
While this might sound like it requires learning a whole new language, understanding how these application-specific shortcuts work is a potential way to increase the overall productivity of a Mac workflow. There are many aspects to consider with this approach, such as the potential need to retrain existing habits that have been established over time. However, even if not everyone embraces this level of detail, simply being aware of this potential path is interesting.
7 Lesser-Known Mac Screenshot Techniques for Precision Screen Capture in 2024 - Exploring Preview App's Lesser-Known Screenshot Features
The Preview app, a standard part of macOS, offers more than just basic image viewing and editing. Many Mac users are unaware of its integrated screenshot capabilities that go beyond simple screen capture. Within Preview, you can initiate screenshots through "File > Take Screenshot" and then choose to grab the whole screen or a specific region. This offers a degree of precision in image capture that is often overlooked. Using the "From Selection" option provides a way to meticulously outline the precise area you need, almost like drawing a shape around it. In addition, using keyboard shortcuts like Command + Control + Shift + 4 provides a fast way to capture specific application windows and copy them to the clipboard. Linking Preview's features to other macOS screenshot tools can make the overall capture and edit workflow smoother and faster. Ultimately, developing a more comprehensive understanding of Preview's less-known tools helps make your Mac screenshot process more efficient. It's a handy skill set to cultivate in 2024 if you want a more refined approach to screen capturing.
The Preview application, a common Mac staple, contains a set of often-overlooked screenshot features that can be quite useful. For example, the Markup tools, often overshadowed by specialized software, use vector graphics for any shapes or lines drawn. This means these components retain their quality when resized, making them beneficial for technical documentation or design scenarios where precision is key. It's intriguing that Preview enables the direct sharing of these annotated screenshots via AirDrop or Messages. This streamlines collaboration for teams requiring rapid feedback since sharing becomes seamless without needing to switch apps.
Preview's ability to handle transparent PNG backgrounds using the Instant Alpha tool offers a degree of flexibility for intricate designs. The user can isolate particular design elements and place them against a variety of backgrounds, which is useful for presentations and more polished professional layouts. While screenshots can be saved in different formats, it's noteworthy that Preview gives you control over image quality during saving. This allows customization of JPEG compression settings, making it possible to balance the file size against visual fidelity. This can be crucial for tasks like optimizing web content or sending email attachments.
Another facet of Preview is its somewhat hidden OCR (Optical Character Recognition) capabilities. This function allows the conversion of a screenshot containing text into editable text using the text tool. It's a handy shortcut in situations where it's necessary to extract text from an image, for example, when pulling code snippets from images or referencing material from captured documents. Furthermore, Preview's built-in PDF conversion can facilitate documentation workflows. By allowing users to transform screenshots into PDFs, it helps streamline the process by maintaining a consistent file format across various projects. This can be valuable when creating official submissions.
Interestingly, Preview has the ability to record screen actions in addition to capturing still images. Users can record screen interactions or tutorials when appropriately configured. This broader functionality enhances the scope of communication options, allowing users to more clearly illustrate complex concepts or software interactions. In the realm of Markup tools, Preview provides the option to adjust the opacity of drawn shapes and text. This layered approach allows for subtle highlighting of important information without overwhelming the viewer. This can help ensure that presentations remain visually clean and professional.
Furthermore, Preview supports batch processing, which can save time for those working with large numbers of images or when there is a need for uniform annotations. A user can apply the same annotations to several images simultaneously, a valuable feature for engineers or designers who work with many documents requiring the same design elements. Lastly, it's worth noting that Preview includes a Color Picker in its Markup tools. This feature lets users extract color palettes directly from a screenshot. This is beneficial for keeping consistency across design projects, allowing designers and engineers to maintain a coherent brand aesthetic. While perhaps not immediately apparent, these are examples of how Preview offers functionality beyond the traditional screenshot capture. These often-missed features enhance productivity and may even open avenues for creating a more efficient work environment.
7 Lesser-Known Mac Screenshot Techniques for Precision Screen Capture in 2024 - Customizing Screenshot File Formats and Save Locations
MacOS offers a way to tailor your screenshot experience by allowing you to change how and where your images are saved. This level of control can be beneficial for both casual users and those with more specialized workflows. Using Terminal commands, you can redirect where screenshots are stored, shifting them away from the desktop and into dedicated folders for better organization. This simple tweak can reduce clutter and improve workflow, particularly when dealing with a lot of screenshots.
Beyond file location, you can also specify the file format of your screenshots using Terminal. Whether you need PNG's for web use, JPG's for sharing, or PDF's for printing, the choices are there. This eliminates the need to manually convert images after capture, streamlining your process. It's worth mentioning that although these customizations primarily appeal to users who are comfortable with the Terminal, they can vastly improve organization and efficiency, regardless of the level of expertise. By utilizing these settings, you gain more fine-grained control over your screenshots, ultimately making the entire capture process more manageable and useful.
### Beyond the Basics: Tailoring Screenshot Output on Your Mac
MacOS offers surprising flexibility when it comes to managing how and where screenshots are saved. While the standard desktop save location might suffice for casual use, there are ways to customize this behavior to improve organization and workflow efficiency, especially for individuals dealing with larger volumes of images or those requiring a more granular approach.
The `screencapture` command, accessible through the Terminal, acts as a powerful tool in this respect. Users can dictate the specific file format for their screenshots—PNG, JPG, PDF, TIFF, or even GIF—depending on the balance they desire between image quality and file size. This level of control is particularly useful when dealing with the tradeoffs in file sizes and the clarity of the resulting images. This could prove significant for engineers working on projects where image integrity or storage constraints play a large role.
Beyond file formats, the `screencapture` command empowers users to automate the save locations of their screenshots. Instead of landing on the desktop, these images can be routed to folders specifically designated for projects, dates, or any other categorization deemed useful for their workflows. This can result in a much cleaner workflow and prevent the accumulation of images in the default desktop folder.
Moreover, the Terminal's command line approach enables subtle enhancements to the capture process. The `-quiet` flag, for instance, silences the default shutter sound during capture—useful in scenarios where ambient noise must be avoided. Similarly, rather than saving a screenshot as a file, the `screencapture` command can be set to send its output directly to the clipboard—a fast way to prepare an image for quick sharing or pasting into other applications. The ability to define an exact capture area through the `-R` option enables precision in capturing a specific section of the screen or window, beneficial for situations requiring exact boundaries.
The Terminal's flexibility also extends to more complex scenarios, including automation. Users can craft scripts that capture a series of screenshots at set intervals, a technique ideal for continuous monitoring of applications or capturing lengthy presentations without manual intervention. The command line interface also allows for the embedding of metadata into the screenshots themselves, adding information like timestamps or relevant project identifiers, which can be helpful for navigating and understanding the context of large image collections.
Furthermore, the ability to define custom naming conventions using `screencapture` commands helps in maintaining well-organized image libraries. By incorporating information like dates, project numbers, or even application states directly into the file name, it is possible to create a systematic and highly readable file naming scheme.
The `screencapture` command also plays well with automation tools like Automator and AppleScript. This feature provides a means for engineers to craft advanced workflows—for instance, a script could automate status checks for running applications while concurrently capturing snapshots of the active windows.
In essence, while basic screenshot tools offer a quick way to grab a snapshot of a display, using the power of the macOS Terminal provides advanced users with an additional level of customization and automation. Controlling file formats, save locations, and even the addition of metadata are only some of the ways that engineers can enhance the process of screen capturing. This refined approach can lead to more effective documentation, better organization, and overall greater control over the entire image capture workflow.
While it does require a degree of command-line literacy, understanding how to customize screenshots via Terminal offers a clear path to more efficient screen capturing practices. This kind of tailored control can translate into significantly greater efficiency, especially for those working on complex projects.
7 Lesser-Known Mac Screenshot Techniques for Precision Screen Capture in 2024 - Implementing Scrolling Capture for Long Web Pages
Capturing lengthy webpages on a Mac often requires a specialized approach. Luckily, the built-in screenshot tools offer a relatively straightforward solution for scrolling captures. You can access the screenshot tool through the Command + Shift + 5 shortcut, then opt for "Capture Entire Page". This method automatically handles the scrolling, eliminating the need for manual capture of each section. Alternatively, a less-formal but equally effective approach is to simply drag your mouse across the screen area you wish to capture. The system will then automatically scroll up to grab the entire visible section within the defined area. These methods are great for standard scenarios. For more complex needs or automated captures, consider exploring third-party tools such as Shottr or Snagit. These options often provide more advanced features and greater control over the scrolling capture process. Overall, implementing scrolling captures can become a vital part of your workflow, especially when working with lengthy webpages that require thorough documentation or sharing.
Capturing long web pages on a Mac can be done in a few ways, but it's not always a smooth process. Sometimes, screenshot tools miss parts of the page, especially if the content is dynamically loaded using JavaScript. This can lead to incomplete images that don't reflect the whole page.
Another challenge is the file size. Capturing long web pages can create massive image files, especially in formats like PNG, which can strain storage space and slow down uploads. Plus, if the page has small text, it can appear blurry or pixelated when captured, particularly if the image is compressed using a lossy format like JPG.
The speed at which you scroll while capturing can also impact the final result. If you scroll too quickly, the tool might struggle to keep up and introduce visual glitches, creating a choppy-looking image. And if you have multiple screens, color calibration and size can vary across the displays, potentially requiring adjustments after the capture.
Different web browsers also have unique ways of handling scrolling captures. The built-in screenshot functions might work differently across browsers, depending on how each handles CSS and page rendering.
This issue becomes even more complex when web pages have embedded frames (iFrames). Many screenshot tools struggle to effectively capture content within these frames, which often requires specific interactions. That means important information can get lost in the capture.
In addition, scrolling screenshots might accidentally capture UI overlays like tooltips or pop-ups, which can obscure the actual page content, creating a misleading or incomplete snapshot.
Despite these potential problems, scrolling capture can be very useful for accessibility testing. Developers can use it to examine how content is displayed over long pages, making sure that everyone has access to the information.
But it's also important to be mindful of legal issues when capturing web pages, particularly for those with proprietary content. Organizations need to consider permissions and ethical implications, especially if they intend to use the captures for business purposes or share them publicly.
In conclusion, while Mac offers built-in tools for capturing long web pages, it's important to be aware of potential pitfalls like incomplete images, large file sizes, and issues with dynamic content, browser differences, and embedded elements. Understanding these factors can help ensure you get the most accurate and useful capture possible.
More Posts from specswriter.com:
- →Efficient MP4 Compression A Deep Dive into File Size Reduction Techniques for 2024
- →Step-by-Step Guide Activating Screen Recording on iPhone iOS 18 in 2024
- →7 Key Elements of an Effective Quick Reference Guide Template for Tech Documentation
- →How H265 Codec Reduces Video File Size While Maintaining Quality in 2024
- →Step-by-Step Guide Resizing Videos for Social Media Platforms in 2024
- →PC Screen Recording Explained Tools and Methods
